
Auto Compression
Zipic Pro provides multiple auto-compression features, including folder monitoring auto-compression and clipboard auto-compression, helping you automate your workflow.
Folder Monitoring Auto Compression Pro
Folder monitoring auto-compression allows you to automatically compress new images added to specified folders using preset compression options.
Steps to Follow
Setting it up is straightforward. Just add a folder in Settings → Automation, and configure the compression options.
-
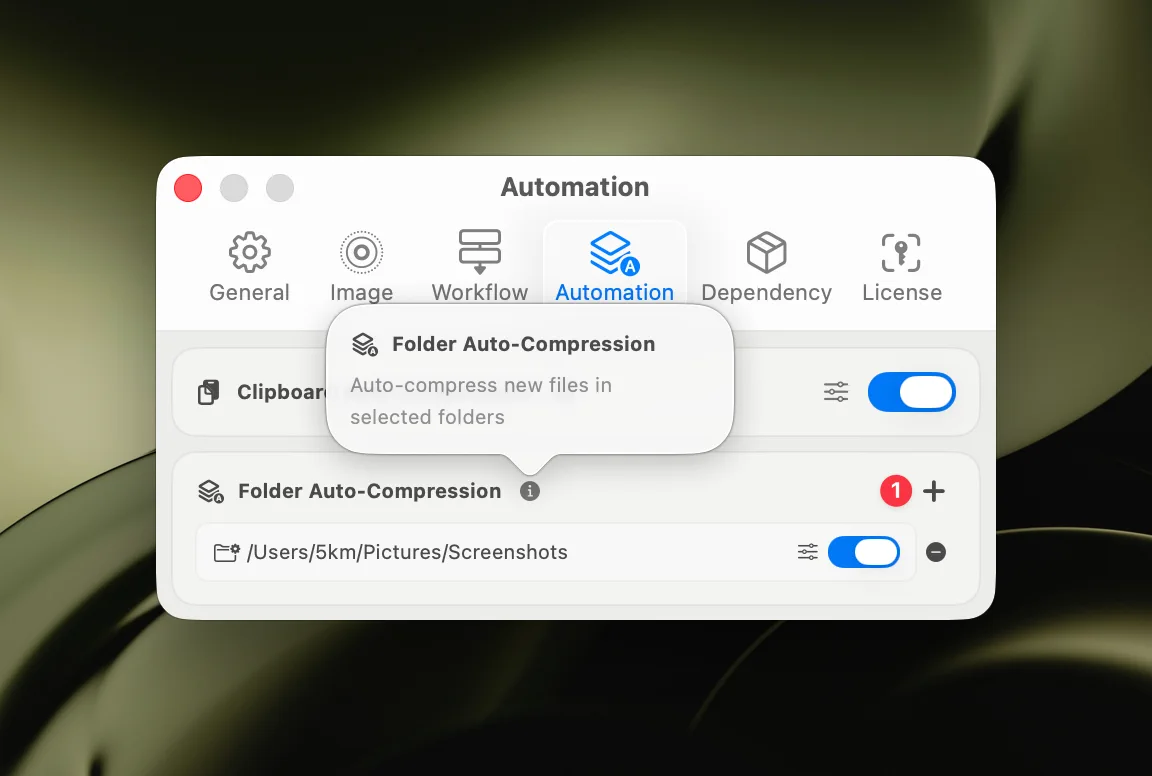
Go to Settings → Automation, find the Folder Auto Compression setting, and click the + button on the right to add a monitoring folder.
-
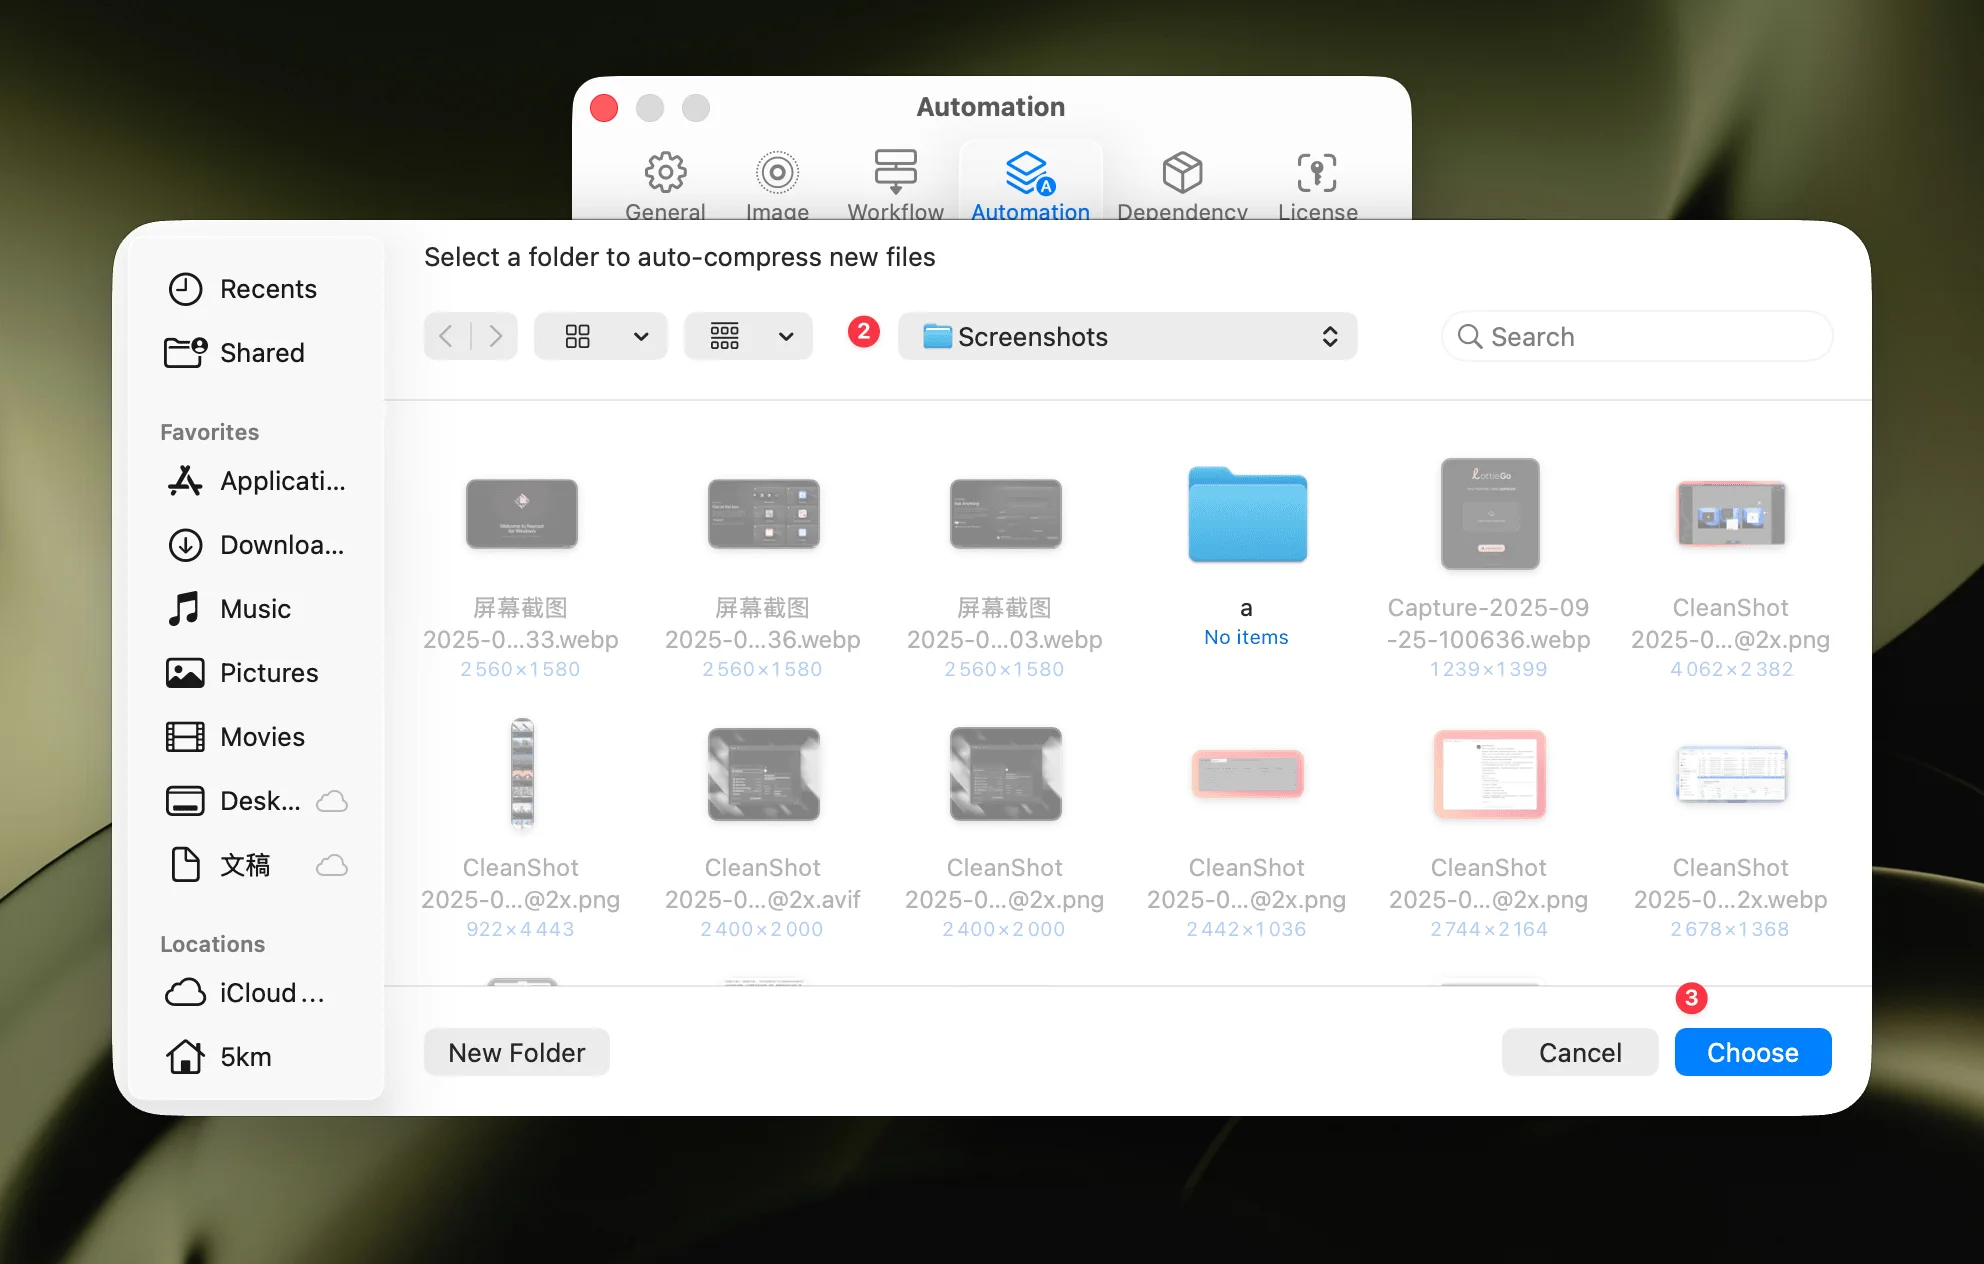
Select the folder you want to monitor in the pop-up dialog.
-
Click the Compression Options button to set your preferred compression settings. In the compression options window, you can configure compression level, output format, save location, and other options. You can also set the monitoring depth to control how deep the folder monitoring goes into subfolders.
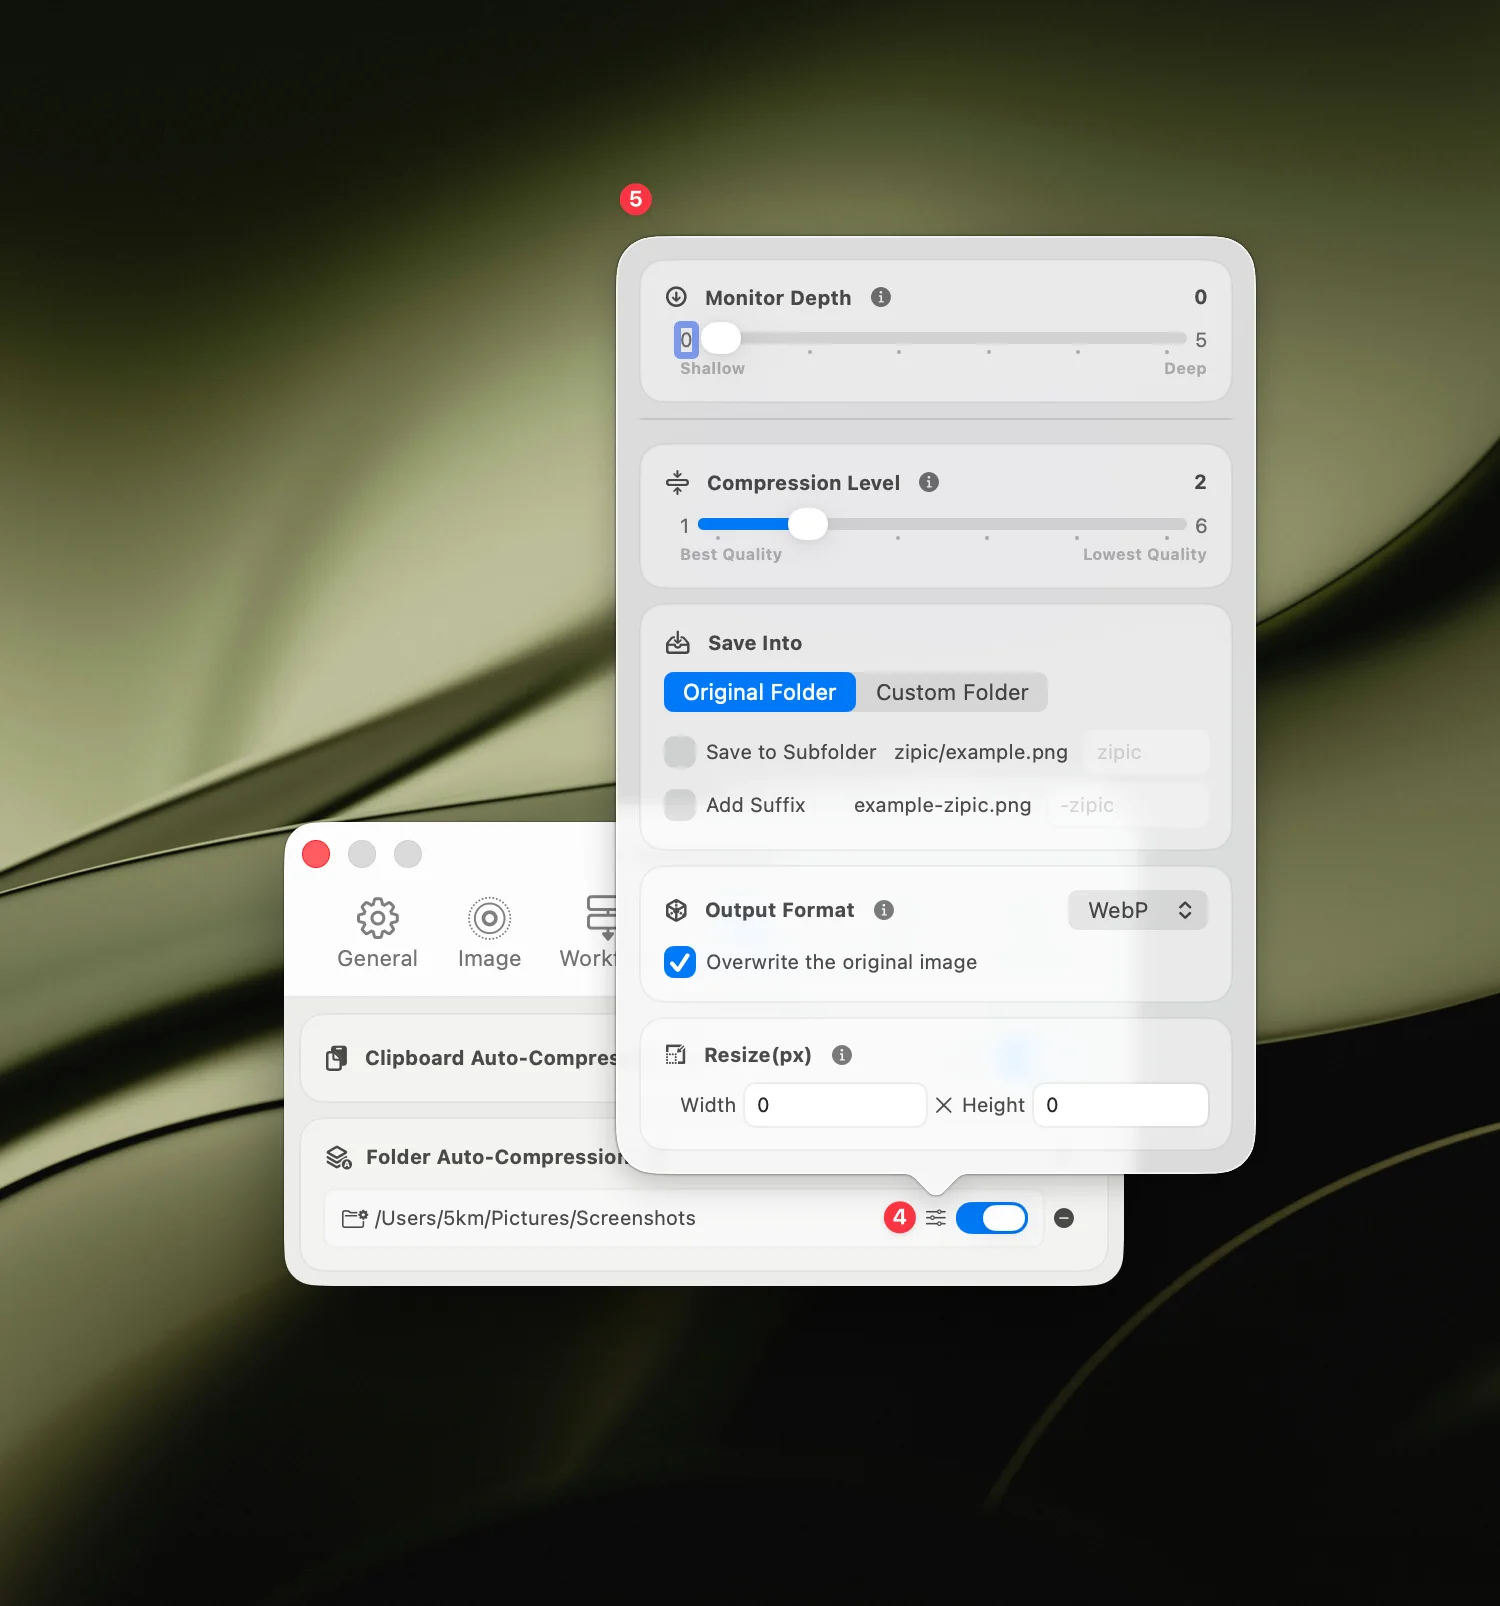
Monitoring Depth Explanation:
- Depth 0: Only monitors the root folder
- Depth 1: Monitors the root folder and its direct subfolders
- Depth 2: Monitors the root folder, direct subfolders, and their subfolders (default depth is 2)
- The greater the depth, the wider the monitoring range, allowing monitoring of more levels of subfolders
- Maximum depth can be set to 5, supporting monitoring of deeper nested folder structures
Example Usage
If your workflow involves continuously saving images to a specific folder, you can add that folder to the monitored list, and Zipic will automatically compress the images.
For instance, in a CleanShot X workflow, I want Zipic to automatically convert screenshots saved to a designated folder into the webp format with level 3 compression. The following video demonstrates the steps:
The video showcases the following steps:
- Show how to set the screenshot save folder in CleanShot X.
- In Zipic, go to Settings → Automation, find the Folder Auto Compression setting, and click the + button on the right to add a monitoring folder.
- Select the folder you want to monitor in the pop-up dialog and click Select (Zipic starts monitoring immediately).
- Click the Compression Options button, set Compression Level to Level 3, and Save Format to webp.
- Test by pressing the shortcut
^ + ⇧ + 3for a desktop screenshot. Zipic automatically compresses the screenshot into the webp format with a compression ratio of 97%.
Smart Skip in Folder Monitoring
Zipic’s Smart Skip feature works seamlessly with folder monitoring. Previously compressed files are automatically recognized and skipped, avoiding redundant processing. If you change compression settings or the source file is modified, Zipic will automatically re-compress the file.
The file monitoring deduplication mechanism has been improved in version 1.9.0, making it more reliable and eliminating potential runaway list growth.
Clipboard Auto Compression Pro
Clipboard Auto Compression is an automation feature introduced in Zipic 1.8 that automatically monitors clipboard changes, detects images, and compresses them, then replaces the clipboard content.
Steps to Follow
Setting it up is straightforward. Just enable Clipboard Auto Compression in Settings → Automation and configure the compression options.
-
Go to Settings → Automation, find the Clipboard Auto Compression setting, and enable the switch on the right.

-
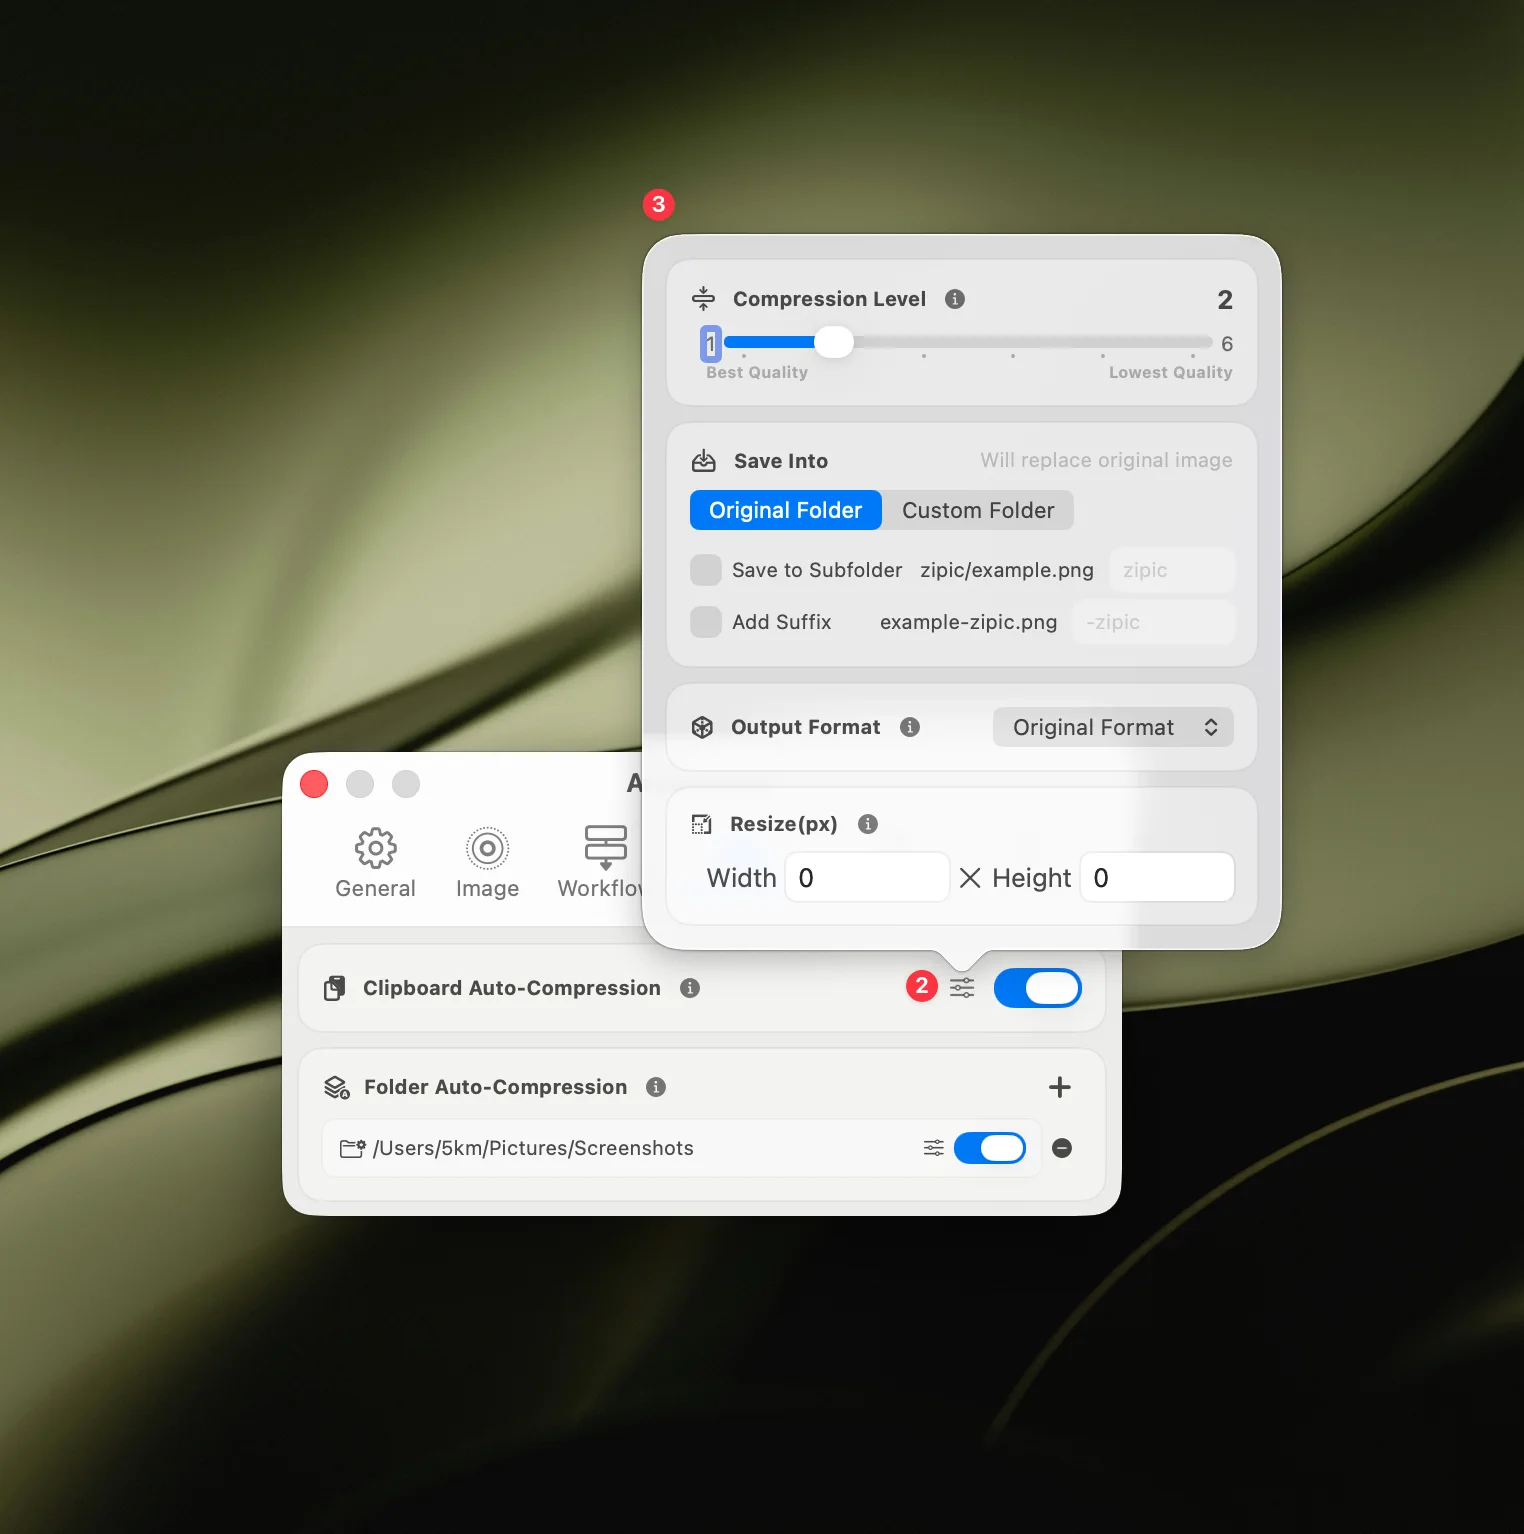
Click the Compression Options button to set your preferred compression settings. In the compression options window, you can configure compression level, output format, and other options.
-
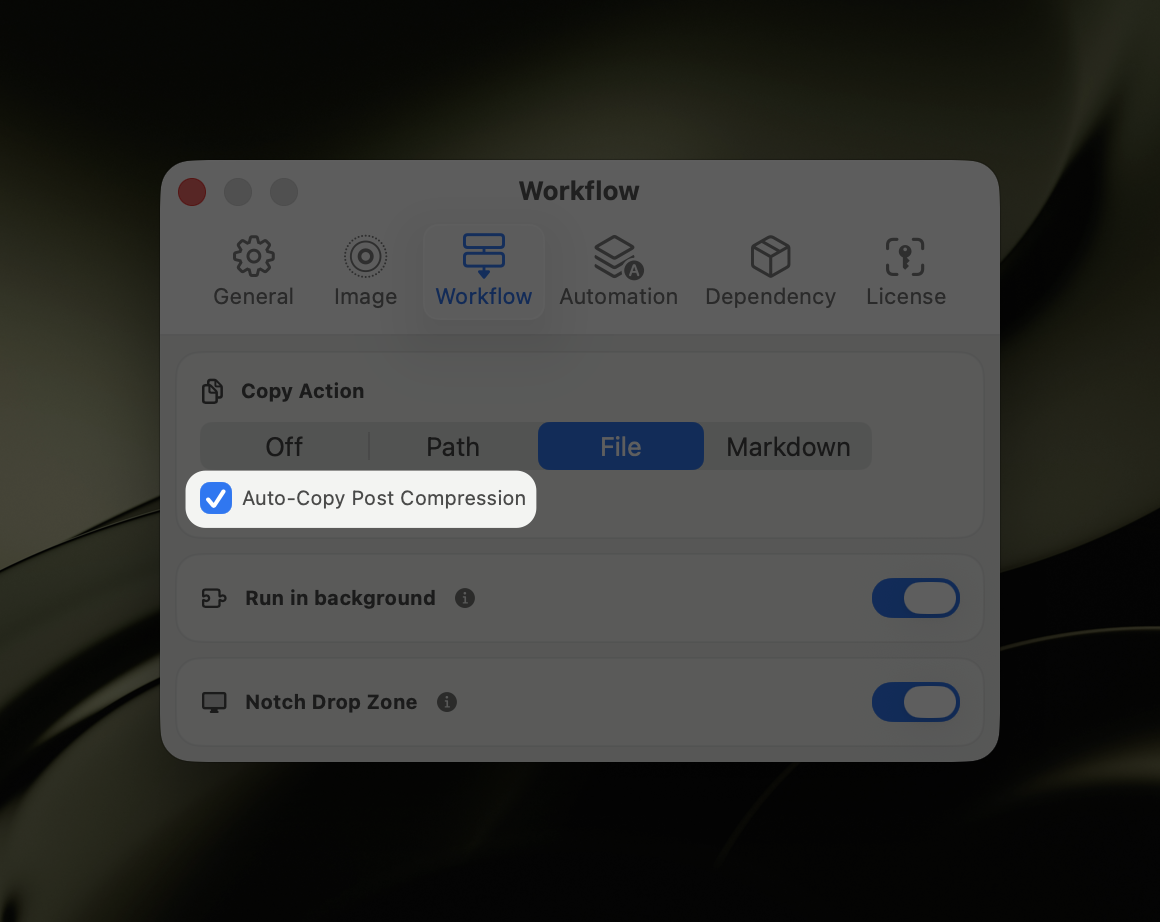
Important: If you want the compressed image to automatically replace the clipboard content, you need to enable the Copy After Compression option in Settings → Workflow.
Usage
Once Clipboard Auto Compression is enabled, when you copy an image to the clipboard (e.g., screenshots, copying images from Finder, copying images from web pages), Zipic will automatically detect and compress it. If the Copy After Compression option is enabled, the compressed image will automatically replace the clipboard content, allowing you to paste it directly.