
Compression Level
Set a reasonable compression level to balance image size and quality. We recommend level 2 or 3. Higher levels mean lower quality but smaller size.
Zipic supports compressing multiple images and all images in specified folders. Currently supported formats include JPEG, PNG (including APNG), WebP, GIF, HEIC, AVIF, TIFF, ICNS, SVG, PDF, JPEG-XL (JXL), with more formats planned.
Follow these steps to compress images with Zipic:
There are two ways to access compression preset operations:
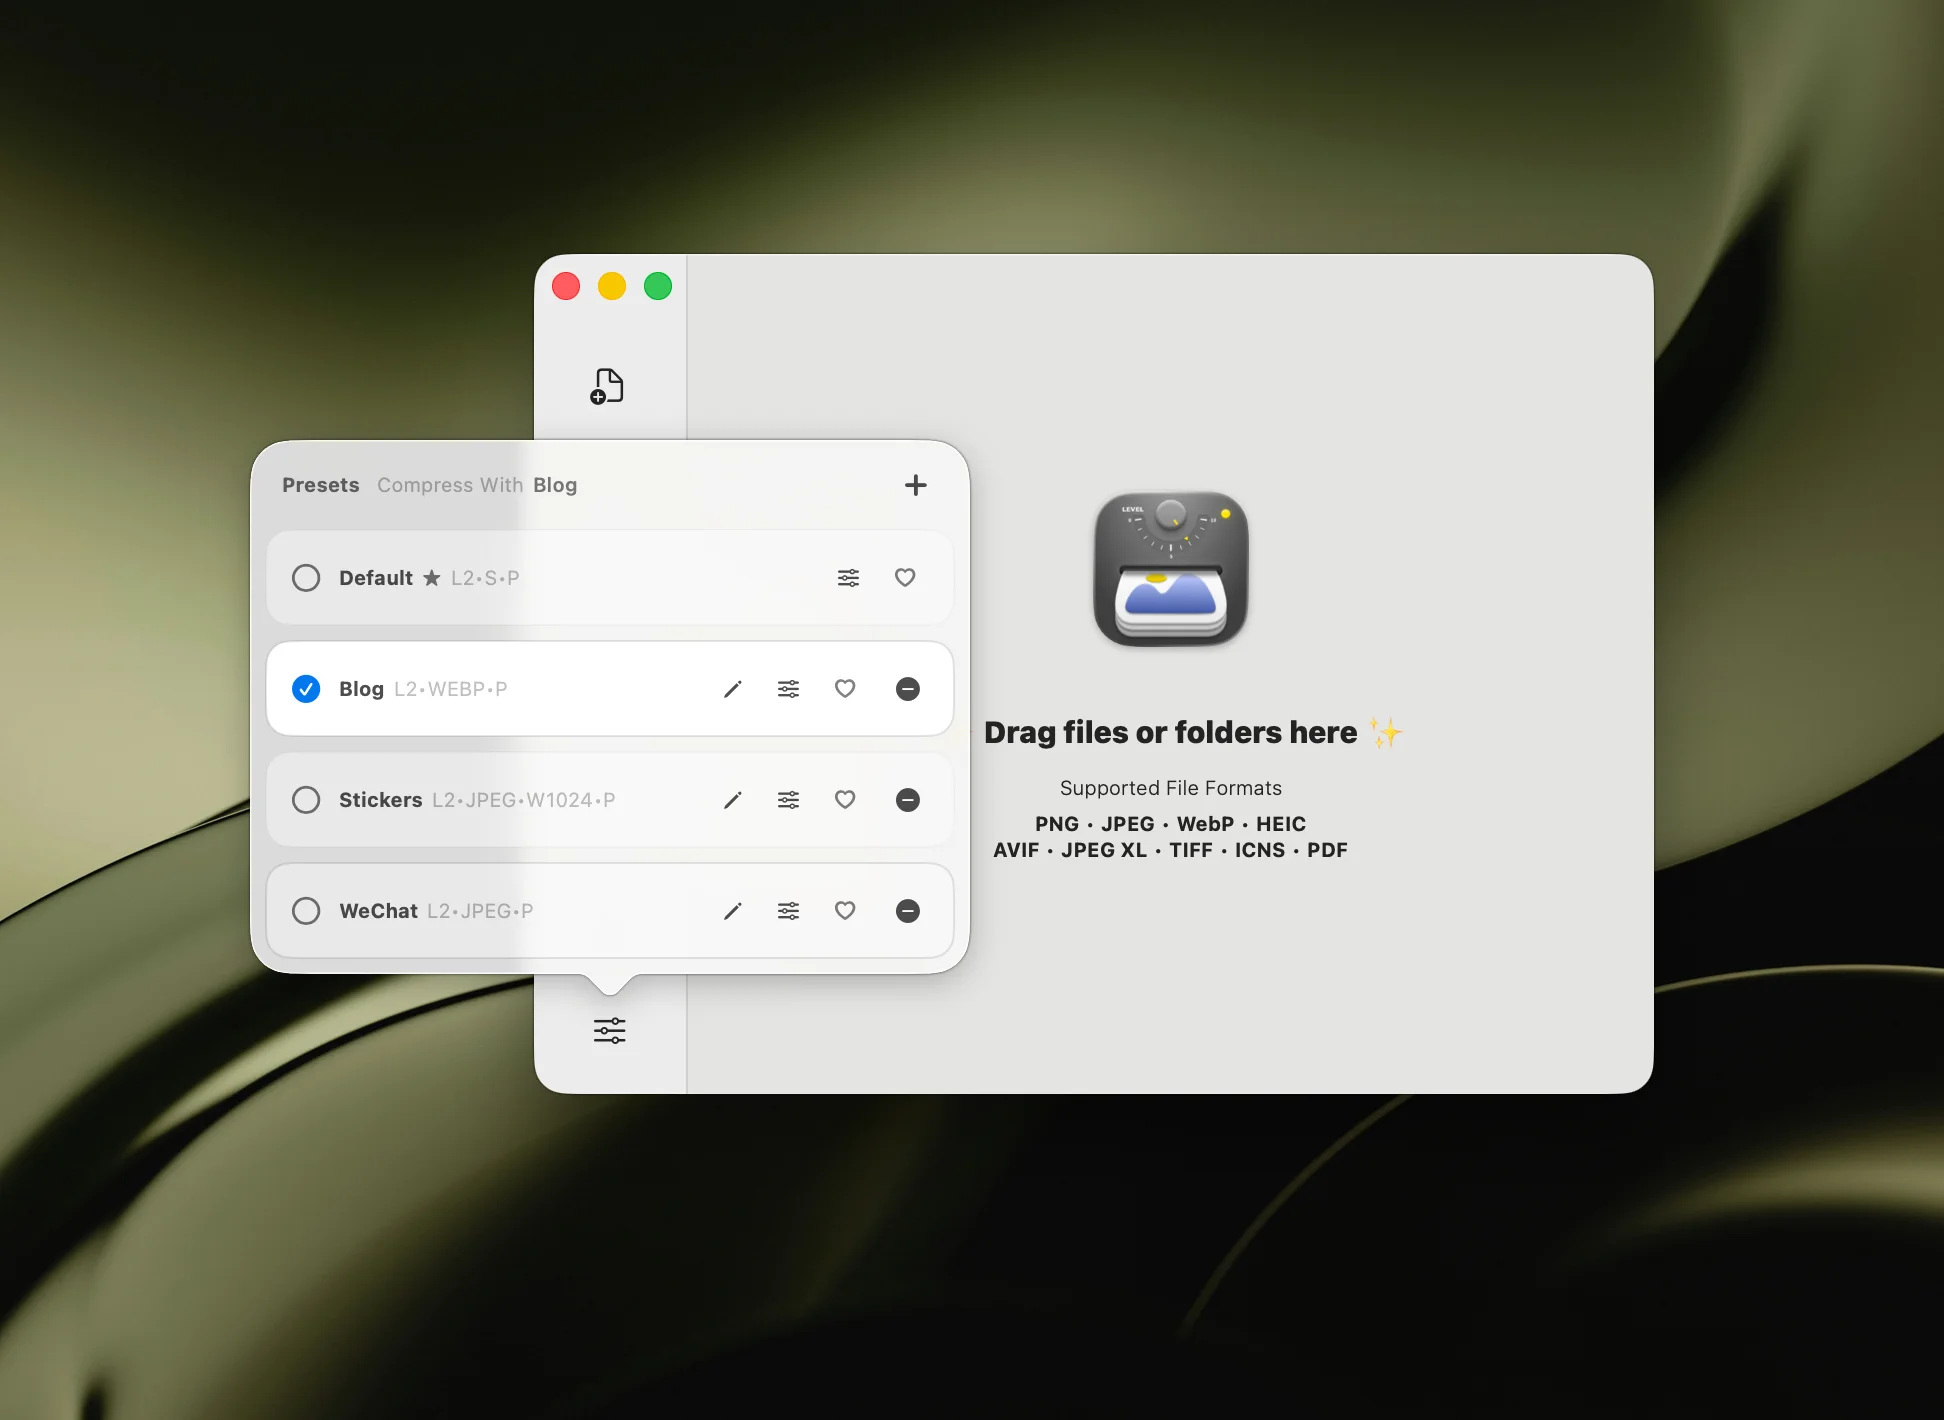
In the compression preset window, you can:
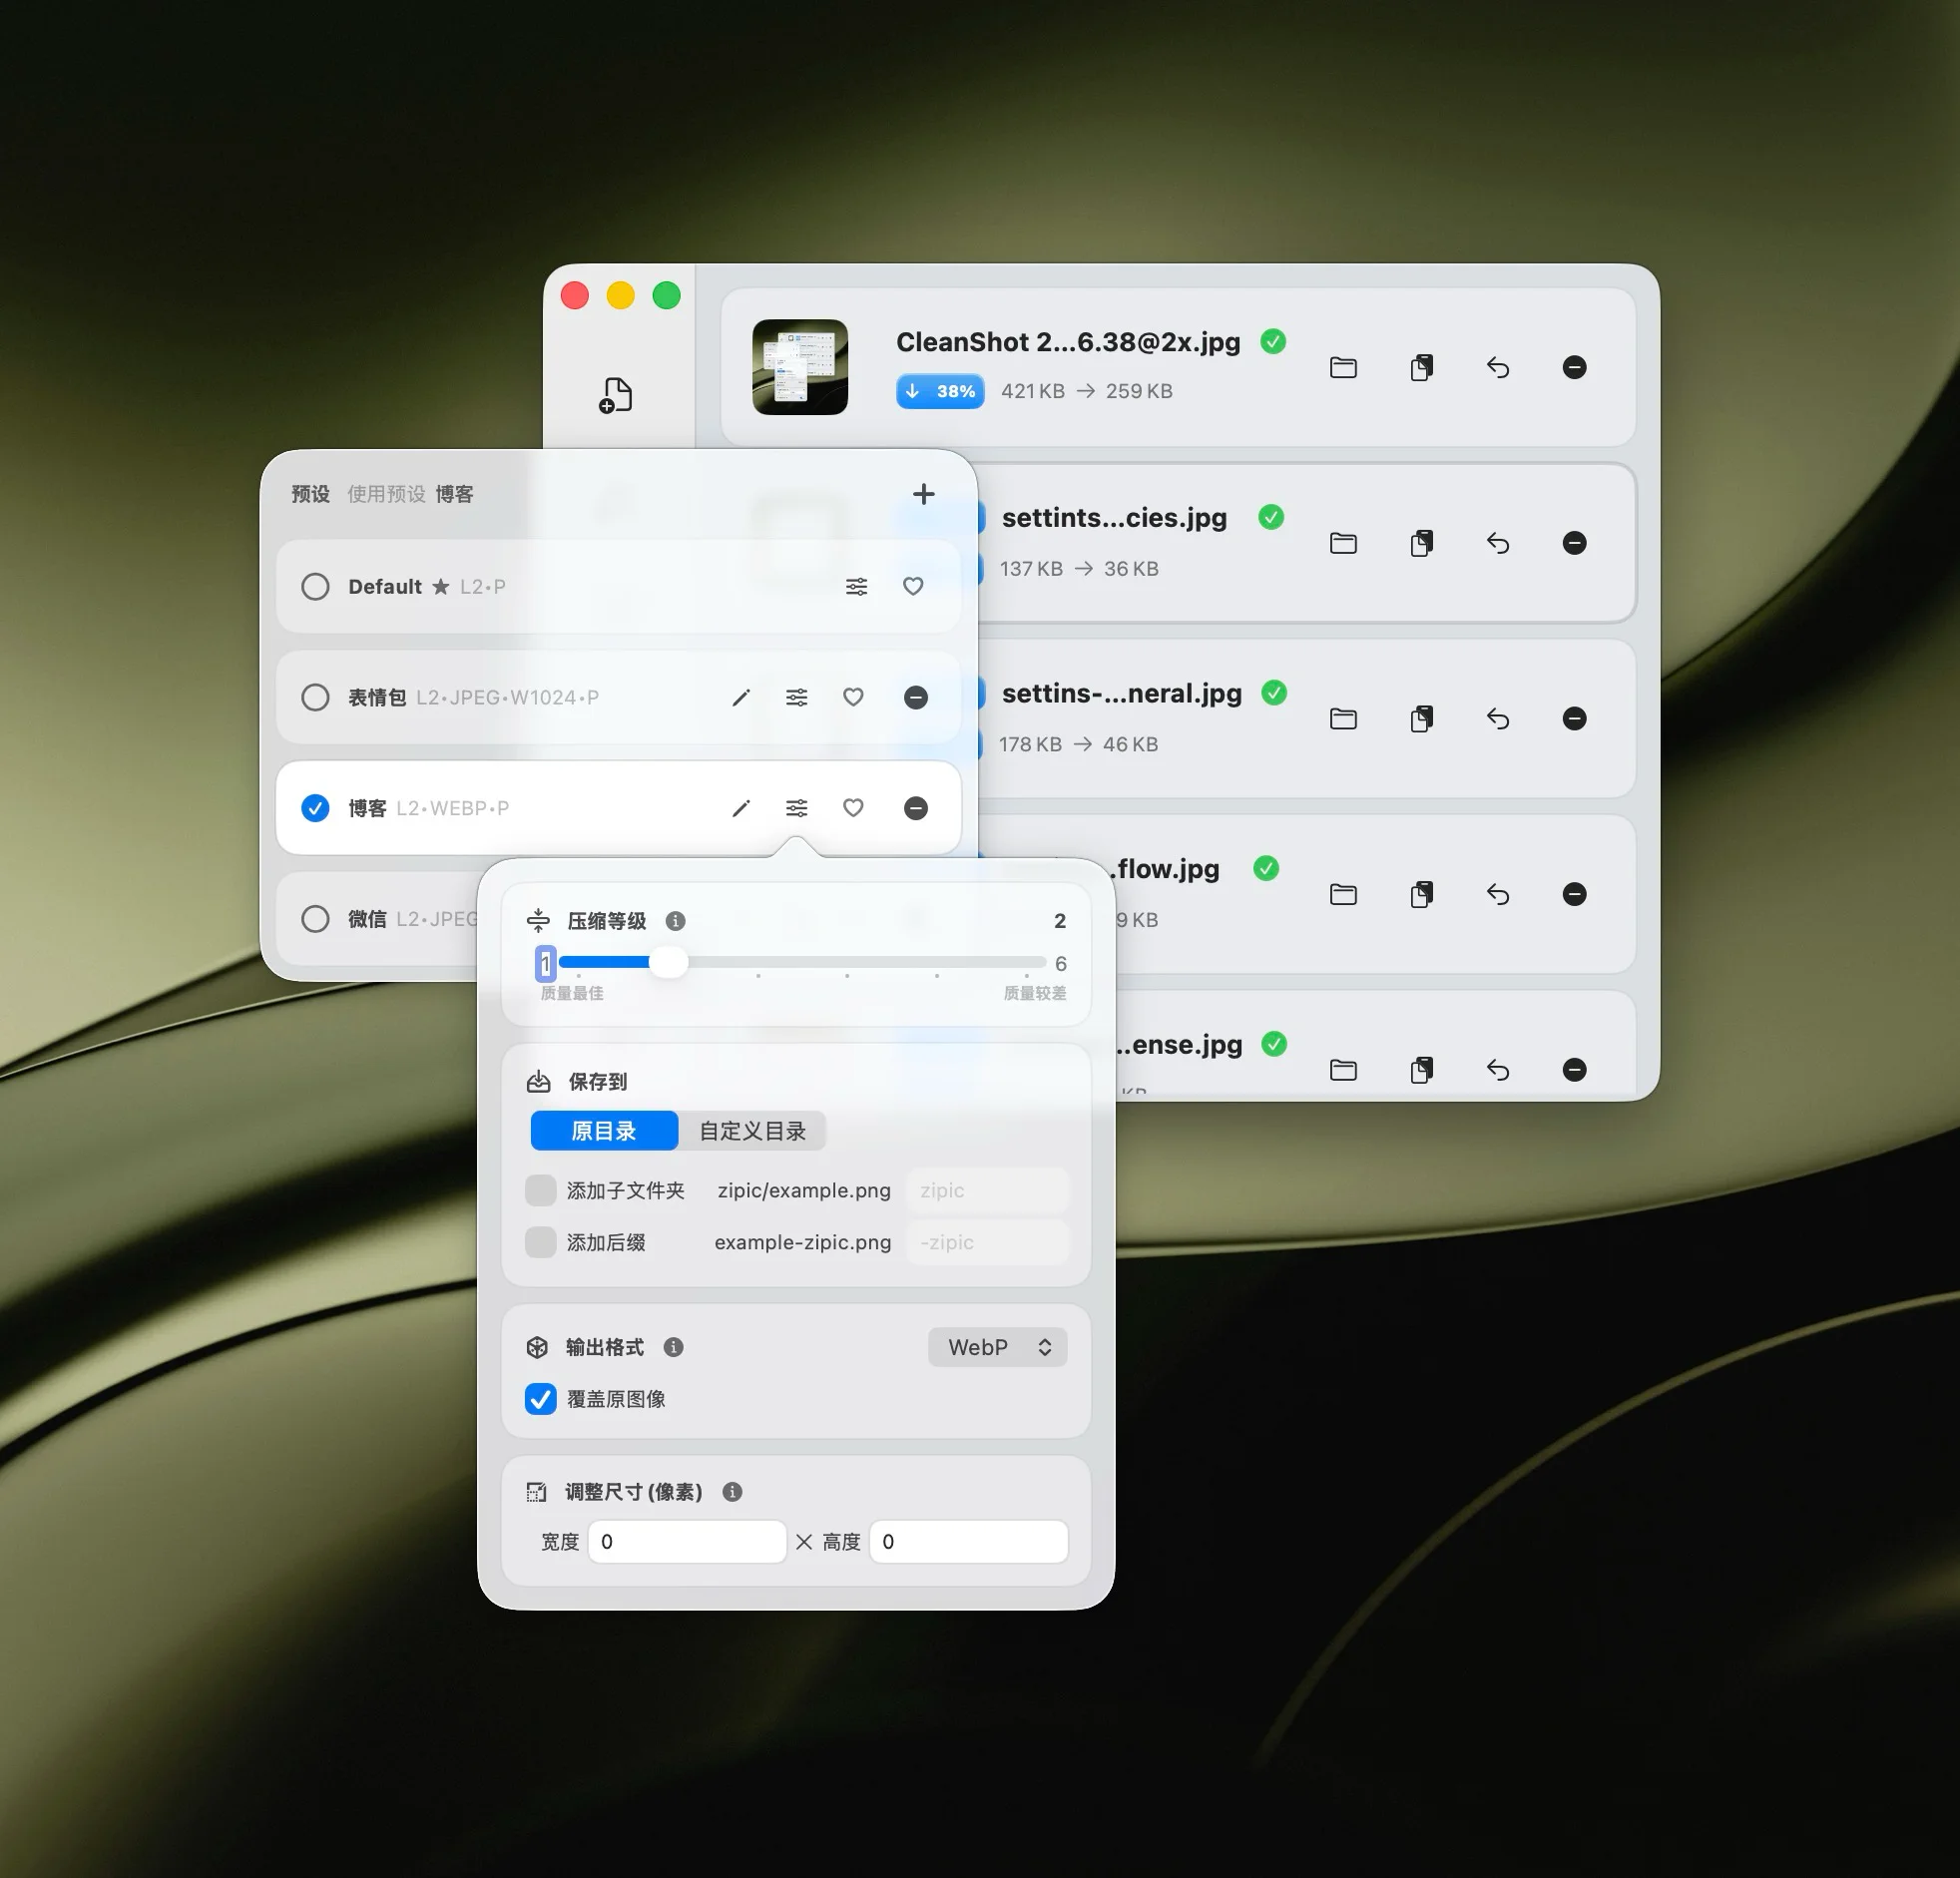
When editing a preset, you can configure the following compression options in the popup:
The edit preset window supports the following operations:
Compression Level
Set a reasonable compression level to balance image size and quality. We recommend level 2 or 3. Higher levels mean lower quality but smaller size.
Save To
Configure where to save the compressed images, whether replacing the original, saving to a specified folder, or adding a suffix. See Save Options for details.
Save Format
Set the target format for compression. Supports converting to JPEG, WebP, HEIC, AVIF, PNG, JPEG-XL (JXL) while compressing. See Compression Formats for details.
Resize
Set the target size for compressed images. By default, the original aspect ratio is maintained. Setting width will auto-adjust height and vice versa. See Resizing Images for details.
Zipic offers several ways to compress images:
Drag and Drop
Drag images or folders into the Zipic main window to compress them. Recommended
Raycast Extension
Use the Raycast extension to compress selected images or folders in Finder. Recommended
Drag to Notch
Drag valid files/directories, and a Notch area will appear in the center of the top of the screen. Drag files/directories into this area and release to trigger automatic compression. Recommended Pro
Paste Compression
Automatically detect and compress images or file directories from the clipboard when pasting. Recommended Pro
Main Window Button
Use the main window button to select images or folders for compression.
Menu Bar Button
Use the menu bar button to select images or folders for compression.
Finder Context Menu
Select Zipic from the Finder context menu to compress images.
URLScheme
Use Zipic’s URLScheme interface for compression. Shortcut Worth Trying
Open the main window and drag images or folders from Finder or the desktop into it to compress.
Hold the ⌥ (Option) key while dragging files to the main window or the Notch area to quickly choose a different compression preset before compressing. This is useful when you want to use a one-off preset without changing your default selection.
See the article Using Raycast Extension for Image Compression.
Drag to Notch compression is an innovative feature introduced in Zipic 1.8, allowing you to compress images more quickly and intuitively.
How to use:

Paste Compression allows you to quickly compress images or directories from your clipboard.
Three methods to use Paste Compression:
⌘ + V to perform paste compression.Paste Compression automatically detects images or file directories in your clipboard and compresses them using your current compression settings. This feature is particularly useful when you want to quickly compress images from various sources without manually selecting them.
Click the Open Images button at the top left of the main window to select images for compression. Supports multiple images and directories.
Click the File menu in the menu bar and select Open Images to choose images for compression. Supports multiple images and directories. Pressing ⌘ + O also opens the selection window.
This method supports selecting a single image. In Finder, right-click the image, choose Open With, and select Zipic to compress.
See Integrating Zipic Capabilities.
Zipic automatically recognizes files that have already been compressed and skips redundant processing. When your compression settings change or the source file is modified, it will re-compress automatically.
After compression, the main window displays the compression records, including image thumbnails, names, sizes before and after compression, status, and compression ratio.
After compression, check if the results are satisfactory.
Click the thumbnail to view the compression effects in the comparison preview window. Zipic Pro includes an enhanced image comparison view with the following features:
This makes it easy to compare before and after compression results side by side. If you only need to adjust compression strength, you can do it directly in the preview window without recompressing.
You can also open Finder to preview the compressed images using macOS Quick Look.
Click the Copy Image button in the compression record to copy the image or path information.
Each compression record in the main window can be dragged to any window that accepts images, like a note window or Finder window, equivalent to a quick copy action.
While Zipic does not persist compression records, we provide options to clear individual or all records for better user experience.
Click the Delete button at the right end of the compression record to delete the current record.
Click the Clear All Records button in the sidebar of the main window, then confirm in the popup to delete all compression records.